DOT Guide

- Quick Installation
- Pull on the “PULL TO OPEN” sticker to separate the front and rear cases.
- Pull out the “PULL OUT” tab between the already installed batteries and the battery compartment to power on the camera.
-
After powering on and waiting for a voice prompt from the camera, the indicator light will flash blue to indicate that the camera has successfully entered pairing mode.
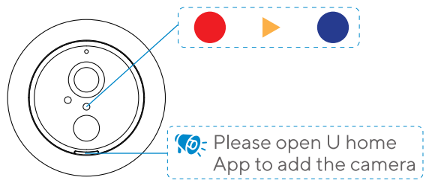
- Open the “U home” app and add the camera. Set up the camera following the instructions on the app.
- Put the front and rear shells back together and press them down to finish installing the camera.
- Easy Setup
-
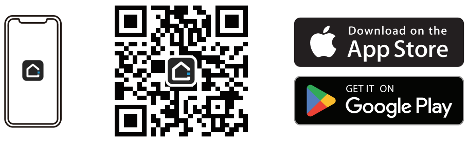
Download the U home app by scanning the QR code on the box or the included instruction manual, or search “U home” in the App Store (iOS) or Google Play (Android).
- Set Up Your Account and Log In
-
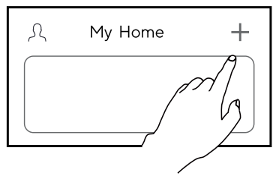
Tap the “+” icon in the upper right corner of the app’s homepage to add the New Camera. Choose Device, Cameras, Ulticam Dot. Click on Start Network Setup. If your indicator light is blinking blue, choose “The blue light is blinking” to continue. Select your Ulticam Dot. Your phone should already be connected to your 2.4GHz Wi-Fi network. Enter the password, and the camera will be linked to your account. Give the device a name and assign it to a room of your choice to complete the setup.
-
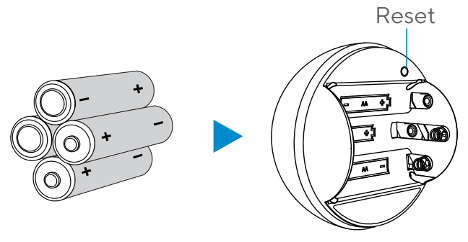
If your indicator light isn’t blinking blue, select “No blinking blue light.” You’ll be shown how to press the Reset button with a pin for 5 seconds or more to enter pairing mode, or 10 seconds or more to enter default mode. Then, you’ll need to go through the setup process again.
-
- Device Interface
- LED Indicator
- Red Blink: Network failure or low battery.
- Green Standby: Everything’s working fine.
- Green Blink: Connecting to the network.
- Blue Blink: Camera is in pairing mode
- Reset Button
- Press for 5 seconds: Enter pairing mode
-
Press for 10 seconds: Reset to Default
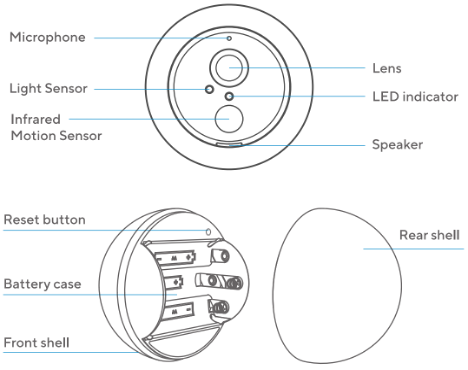
- LED Indicator
4. Quick View on U home App Dashboard
- Battery meter
- Camera name
- Camera settings
- Notifications of this camera
- Last timestamp & snapshot
- Notifications of ALL devices
-
Add devices, admin, and action items
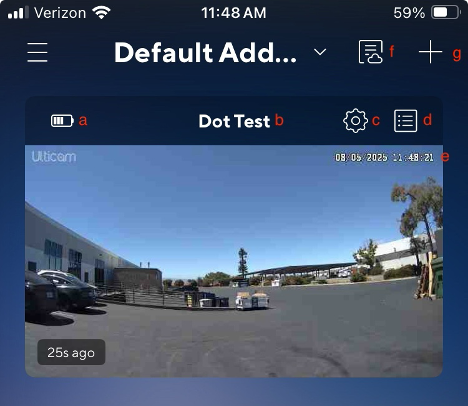
5. Main Views (Live or History)
- Live (Press Play button Mid screen)
- Landscape mode Tap Square icon lower right screen
- Microphone Broadcast sound to your Dot speaker
- Record Record live events
- Screenshot Take a screenshot
- Mute Disable the sound
-
Alert Dot speaker will emit a siren sound
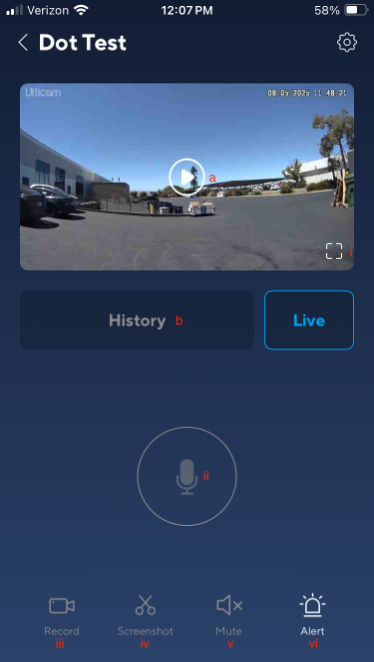
- Landscape mode Tap Square icon lower right screen
- History(Click on History for recorded events)
- Playback controls Lower portion of screen
- Video Slider Scroll recorded events
- Date selector Select dates of recorded events
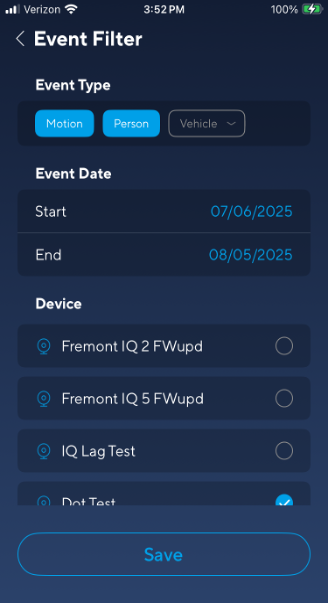
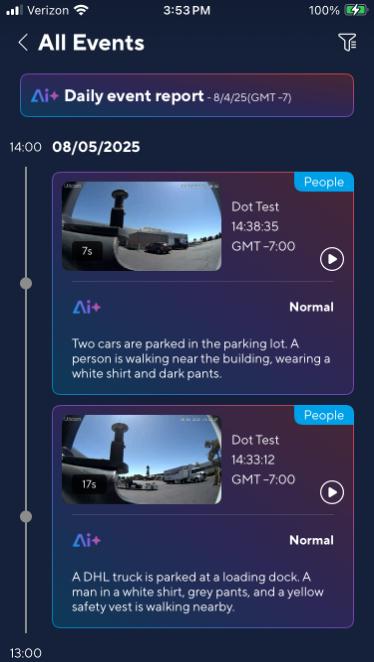
- All Events Refine event filters for more accuracy
- Types
- Motion
- Person
- Vehicle
- Date range
- Device selection
- Types
-
Share, download, take screenshot, mute audio, donate and delete videos
-
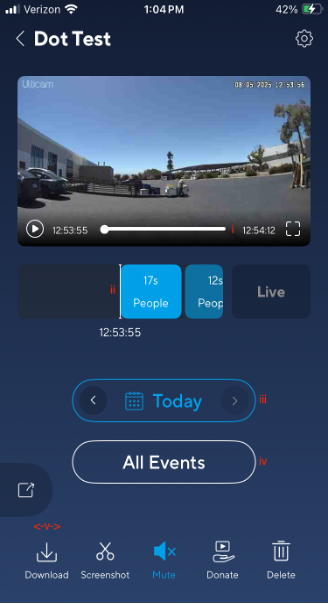
- Playback controls Lower portion of screen
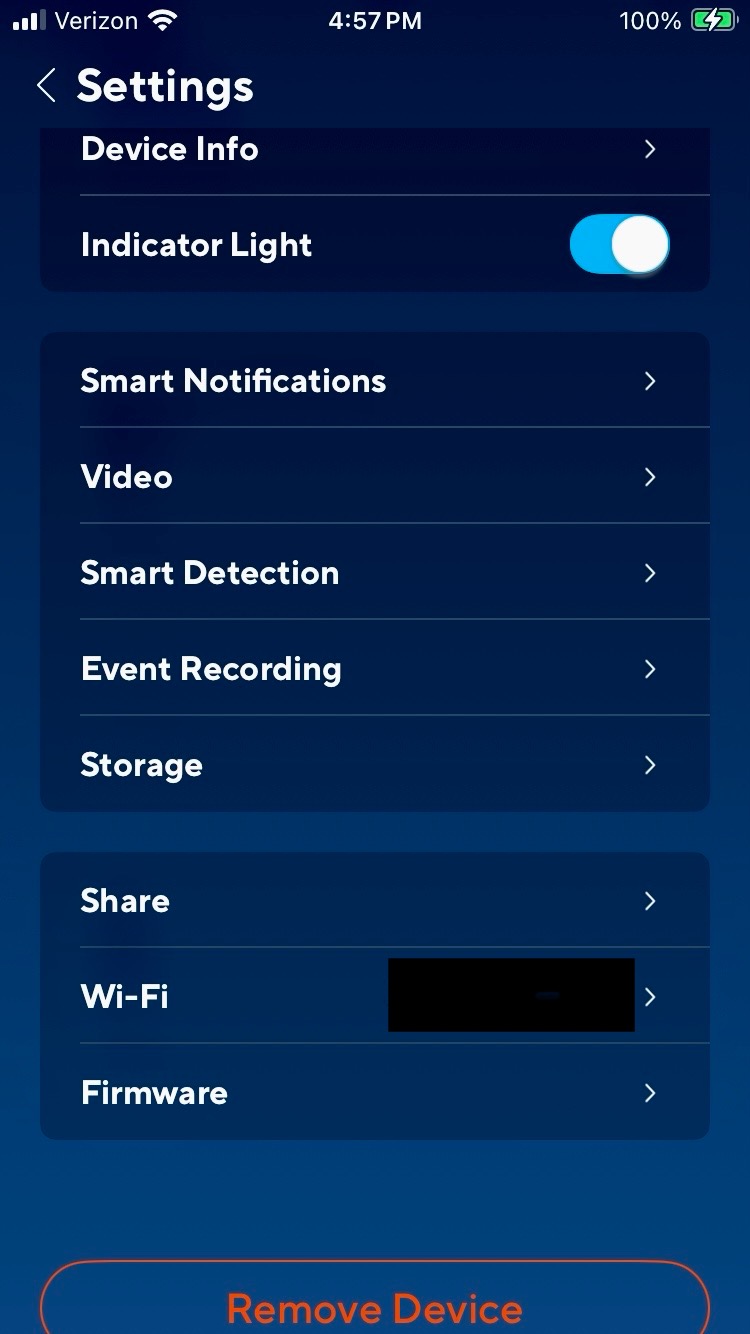
6. Camera Settings: (Smart Notifications, Smart Detection, and Share will have their own guides in more detail.)
- Device Info Name, location, SN, Mac, battery status
- Indicator Light Toggle on/off
- Smart Notifications Personalize your preferences
- Video Video quality, Night mode, Logo & Date
- Smart Detection Arm/Disarm, Detection parameters
- Event Recording Select maximum video length
- Storage Select cloud or local storage
- Share Share your camera with other users
- Wi-Fi Status and update Wi-Fi connection
- Firmware Update your Dot firmware
- Remove Device
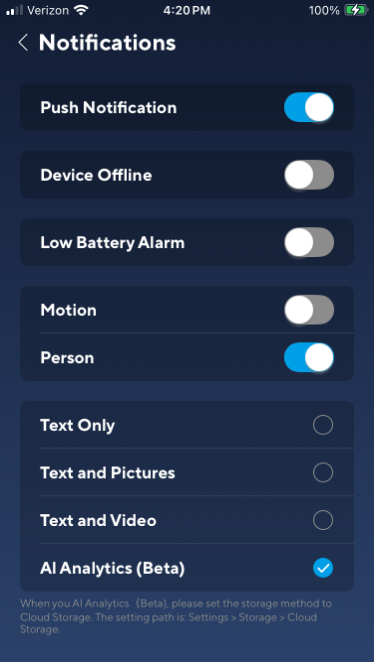
7. Smart Notifications: Personalize notifications and turn on Google Gemini AI Analytics (To use Gemini AI, you must select AI Analytics in Notifications and Cloud Storage in Storage, both in Settings.)
- Push Notification: toggle on/off as desired
- Device Offline: toggle on to receive offline notification
- Low Battery Alarm: toggle on to receive low battery warning
- Motion: toggle on to receive Motion notifications
- Person: toggle on to receive Person notifications
- Choose one between
- Text Only
- Text and Pictures
- Text and Video
-
AI Analytics (Beta) [Select this and Cloud Storage (6.Camera Settings/ g.Storage) to enable Google Gemini AI Analytics which includes 7-day rolling Free Storage]
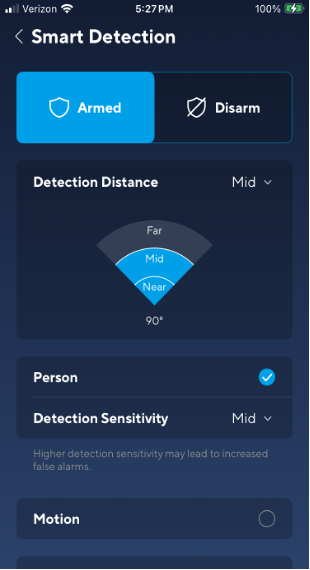
8. Smart Detection: Choose what, where, and how you want the camera calibrated.
- Armed/Disarmed
- Detection Distance
- Person Detection
- Detection Sensitivity Higher sensitivity may lead to more false alarms
- Motion Detection
-
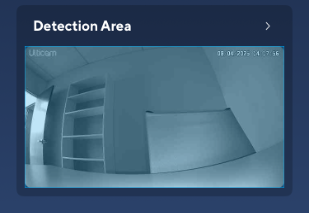
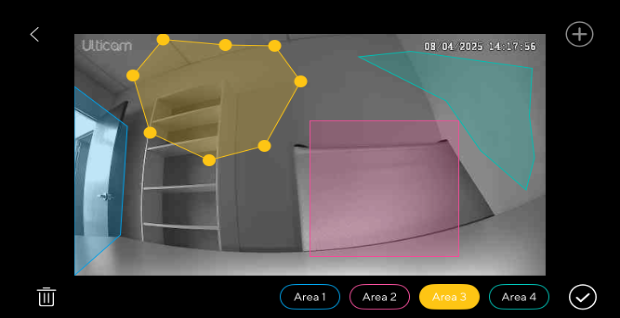
Detection Area Up to 4 detection zones for more accuracy
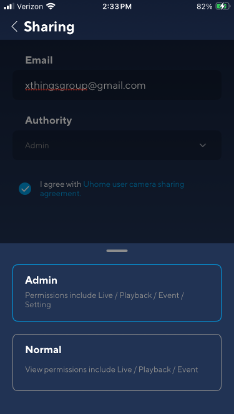
9. Share: Shared users can access the live video, playback, and video events. Shared admin users can also access the settings of the device.
-
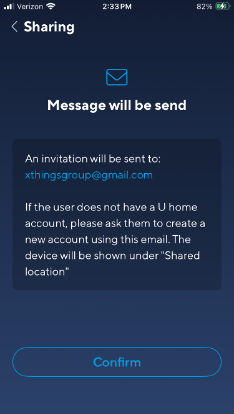
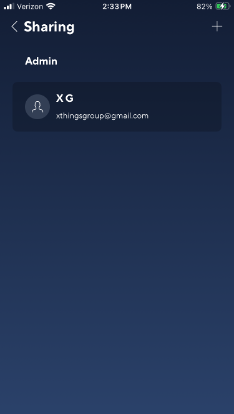
Go into Settings and then Share, then tap the ‘+” symbol on the upper right. Select either Email or Mobile and enter the email or phone number you’d like to share the device to. Select the Authority of (Admin or Normal). Agree with the U home sharing agreement, save, and confirm. The camera is now shared with user XG. User XG has received an email with the instructions on how to proceed, and gain access to the shared camera. Since the user was given Admin rights, XG will be given live video, playback, video events, and camera settings.
Comments
0 comments
Please sign in to leave a comment.